

TL;DR: Crisp audio can make or break your stream and directly shapes the viewer experience. With the right mic, a few smart tweaks, and Streamlabs Desktop's built-in settings, you can level up your sound quality fast.
Jump Ahead:
- What Makes Good Live Stream Audio
- Platform Audio Requirements You Should Know First
- Common Live Stream Audio Issues
- Check Your Audio Routing
- Add Music and Sound Effects
- Choose the Right Microphone
- Optimize Your Environment
- Monitor Your Audio in Real Time
What Makes Good Live Stream Audio
Good live stream audio is about more than just volume-it's about consistency, clarity, and balance. Viewers should hear your voice without straining, background noise should be minimal, and sudden loud sounds shouldn't distort the audio completely.
The goal is audio that feels natural, balanced and easy to listen to for long periods of time. When your audio is crisp and reliable, you not only sound more professional but also keep viewers from clicking away.
Platform Audio Requirements You Should Know First
Before tweaking filters or buying new gear, check the requirements of the platform you're streaming on. Even the best audio setup won't shine if your stream exceeds platform limits.
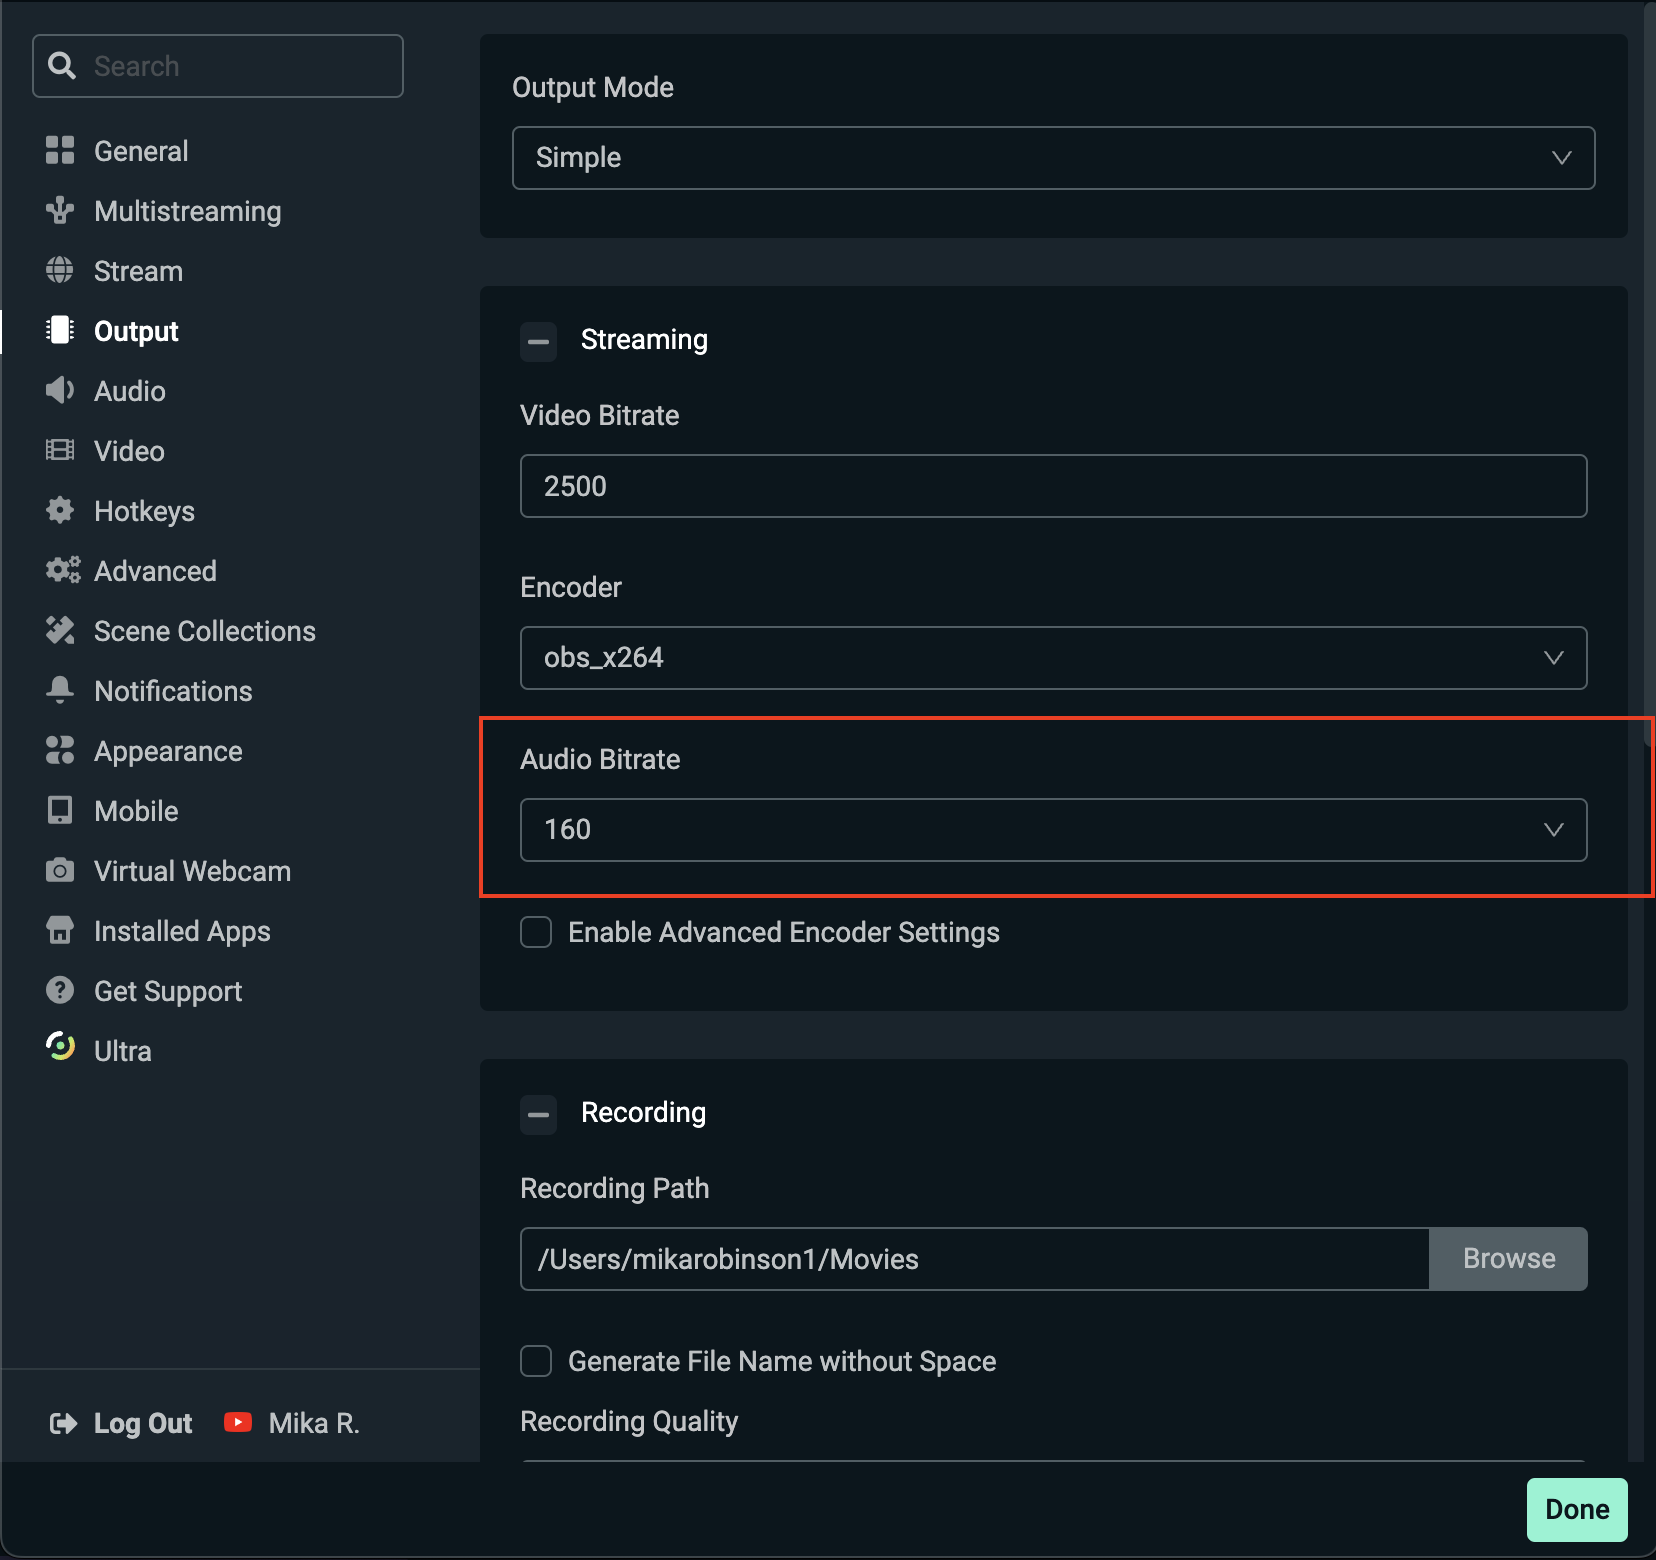
- Twitch: Max audio bitrate of 160 kbps
- YouTube: Supports up to 128 kbps for stereo streams (higher for surround sound, up to 384 kbps)
- Facebook Live: Stereo audio at 128 kbps
Tip: In Streamlabs Desktop, adjust this in Settings > Output > Streaming Tab > Audio Bitrate. Match your platform's limits to avoid distortion or unnecessary compression.
Common Live Stream Audio Issues
Not sure what's wrong with your audio? Here are some red flags to listen for when reviewing your VODs or test recordings:
- Background noise - Do you hear a steady hum from your PC fan, AC unit, or street traffic bleeding into your stream?
- Low or inconsistent volume - Are viewers constantly telling you to turn your mic up-or struggling to balance your voice against game or music audio?
- Clipping/distortion - Does your voice sound crunchy or crackly when you laugh, yell, or spike your volume?
- Echo/reverb - Does your mic pick up your voice, or does it sound like it's thrown around the room?
- Audio/video sync issues - Is your voice/sound slightly delayed compared to your facecam or gameplay?
Check Your Audio Routing
Audio routing is how your computer organizes and sends different sounds-your voice, game, music, alerts-to the stream. Even with the right mic and filters, poor routing can break your audio.
Check your Audio Mixer before going live. Make sure each source (mic, game, music) is routed correctly and not doubling or missing entirely.
-
On Windows: Streamlabs Desktop can capture both your microphone and system (desktop) audio directly. You'll usually see these in the Audio Mixer by default.
-
On Mac: There are system limitations-macOS doesn't natively allow direct desktop audio capture. To fix this, you'll need to install a virtual audio driver (like BlackHole) to bring desktop audio into your mix.
Add Music and Sound Effects
Once your core audio is clear, you can layer in music and effects to enhance the vibe of your stream. These aren't required, but when balanced properly, they can make your broadcast feel more engaging and professional.
-
Background music: Keep it subtle. Use tracks that sit quietly under your voice without competing with your game, sound effects, etc. FYI, Streamlabs integrates with platforms like Pretzel Rocks and Slip.stream which offer streamer-safe music through the App Store.
-
Sound effects: Alerts (subs, donations, follows) and quick stingers can add personality, but don't overdo them. Too many effects can overwhelm anyone.
-
Balance is key: Always prioritize your voice. Use Streamlabs Desktop's mixer to pull music and effects down so they enhance the stream without becoming distracting.
Choose the Right Microphone
Your mic is the foundation of your sound. Below are different types of mics you can consider.
- USB microphones: Affordable, plug-and-play, great for beginners
- XLR microphones: Professional quality with more control (requires interface or mixer)
- Built-ins: Will suffice but may sound thin and pick up too much background noise
Check out our list of microphones recommendations for live streamers to get a better idea of the mic that may be best for your setup and needs.
Optimize Your Environment
Your room plays a huge role in how you sound. Even the best microphone can't fully compensate for a noisy or echoey environment. Adding soft surfaces like rugs, curtains, or foam panels will reduce echo.
Also, keep your mic away from loud gear such as fans or AC units, and when possible, choose a cardioid pickup pattern to focus on your voice while rejecting unwanted sounds.
Configure Audio Filters in Streamlabs Desktop
Streamlabs Desktop has built-in audio filters that can instantly polish your mic. Here's how to set them up:
Step 1: Go to the Audio Mixer panel (the bottom right of Streamlabs Desktop).
Step 2: Hover over your microphone source and click the ⚙️ gear icon.
Step 3: Select Filters from the dropdown menu.
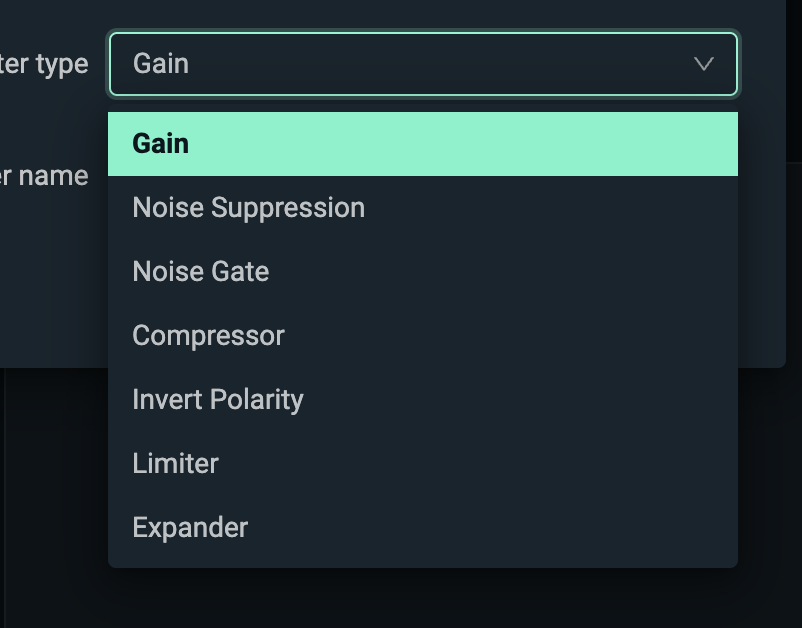
Step 4: Click the + button to add a filter. Recommended options include:
- Gain: Boosts or reduces your mic volume. Helpful if your microphone is naturally too quiet, but raising it too much can also increase background noise.
- Noise Suppression: Removes steady hums like fans or AC units.
- Noise Gate: Blocks low-level sounds (like keyboard clicks or background chatter) when you're not speaking.
- Compressor: Smooths out your volume so quiet speech is audible and loud spikes don't overwhelm.
- Invert Polarity: Flips the audio waveform-mainly useful for advanced setups to prevent phase issues when using multiple mics.
- Limiter: Sets a hard maximum volume level to prevent clipping and distortion.
- Expander: Similar to a noise gate, but more flexible. It reduces background noise without fully cutting off your mic.
Step 5: Record a short test clip (or run a private stream) and fine-tune each setting until your audio is clean but natural.
Monitor Your Audio in Real Time
Monitoring your audio ensures your sound stays consistent throughout your stream. Always wear headphones to avoid echo and feedback, and use Advanced Audio Properties in Streamlabs Desktop to turn on audio monitoring so you can hear yourself as you stream.
It's also a good habit to review your VODs after each broadcast because what sounds fine in your headphones might play differently for viewers.
Pro-Tip: If you're using the Streamlabs Intelligent Stream Agent, the on-screen avatar can give you real-time alerts when your mic is too quiet, clipping, or muted.
Great live stream audio doesn't require a studio-just the right mic, smart environment tweaks, and settings yourself up for success with tools like Streamlabs Desktop. Start simple, refine with filters, and let your audience enjoy a clean, professional sound.